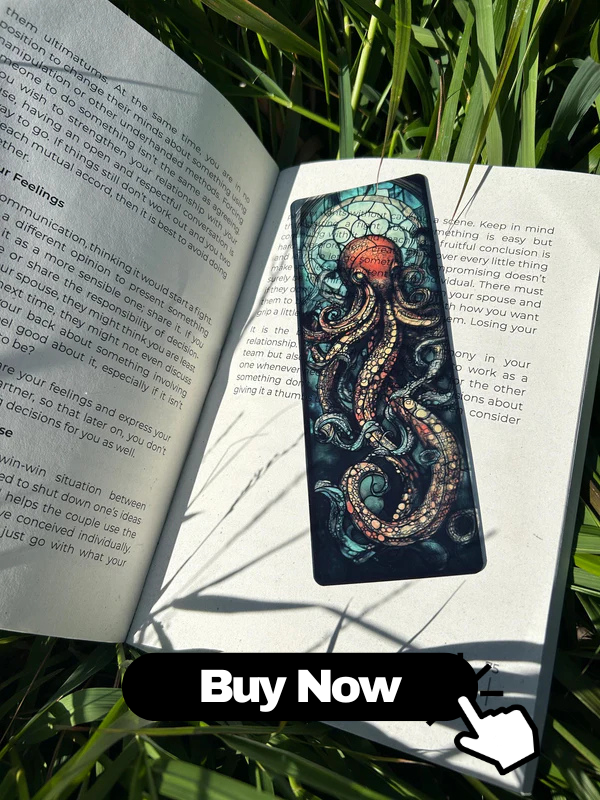
Handmade bookmarks are more than simple placeholders for your favorite pages—they are small works of art that express personality, creativity, and craftsmanship. From choosing the right paper or fabric to adding decorative elements like tassels, beads, or hand-lettering, the journey of crafting a handmade bookmark combines design, technique, and attention to detail. In this comprehensive guide, you’ll learn exactly how handmade bookmarks are crafted from start to finish, what materials are used, which techniques work best, and how you can create your own high-quality, durable, and beautiful bookmarks at home.
Why Handmade Bookmarks Are So Special
Handmade bookmarks stand out in a world filled with mass-produced stationery. They are valued not only for their function but also for their uniqueness and emotional significance.
- Personal expression: Each handmade bookmark reflects the maker’s style, taste, and creativity. No two pieces are exactly the same.
- Thoughtful gifts: Customized bookmarks with names, quotes, or themes make highly personal gifts for book lovers, students, teachers, and librarians.
- Eco-friendly potential: Many crafters use recycled paper, repurposed fabric scraps, and sustainable materials to create bookmarks that are both beautiful and environmentally conscious.
- Art in miniature: Handmade bookmarks are like tiny canvases where artists experiment with illustration, calligraphy, watercolor, collage, embroidery, and more.
Because of these qualities, handmade bookmarks are increasingly popular on online marketplaces, craft fairs, and DIY blogs, making “how to make bookmarks by hand” a frequently searched topic among creative readers.
Planning the Design
Before cutting or gluing anything, skilled bookmark makers begin with a clear design plan. Thoughtful planning ensures that the final bookmark is visually appealing, functional, and durable.
1. Define the Purpose and Audience
- Personal use: You might choose designs that match your favorite genres, colors, or reading habits.
- Gifts: Customize themes (e.g., fantasy, floral, minimalist, vintage) based on the recipient’s personality.
- For sale: Consider current trends, popular book fandoms, aesthetic styles (cottagecore, dark academia, etc.), and seasonal themes.
2. Decide on Size and Shape
Most traditional bookmarks follow a rectangular shape, but handmade bookmarks allow for creativity.
- Standard rectangle: Approximately 2" x 6" (5 x 15 cm) fits most books comfortably.
- Skinny bookmarks: Narrow designs around 1.5" wide work well for compact books.
- Corner bookmarks: Triangular pieces that slip over the page corner.
- Shaped bookmarks: Hearts, leaves, animals, or character silhouettes cut from sturdy materials.
When planning size, always consider:
- Book thickness: Avoid very bulky designs for thin paperbacks.
- Overhang: Leave a portion that sticks out of the book for easy retrieval.
3. Choose a Visual Theme
A clear theme helps you coordinate colors, patterns, and embellishments.
- Nature-inspired: Leaves, flowers, birds, celestial motifs.
- Literary: Quotes from classic novels, typewriter fonts, vintage paper.
- Minimalist: Clean lines, solid colors, subtle typography.
- Whimsical: Cartoon characters, playful doodles, bright palettes.
Sketching a rough layout on paper (or digitally) before beginning the crafting process helps avoid costly mistakes later.
Choosing Materials for Handmade Bookmarks
The materials you choose directly influence how your handmade bookmark looks, feels, and lasts. High-quality materials create a professional finish and help your bookmarks withstand regular use.
1. Base Materials
- Cardstock: A popular choice for paper bookmarks. Choose acid-free cardstock between 200–300 gsm for strength and durability.
- Watercolor paper: Ideal for painted designs. Its textured surface absorbs paint beautifully without warping too much.
- Chipboard: A thicker, sturdier option often used for more rigid bookmarks.
- Fabric: Cotton, linen, felt, or canvas can be used for soft bookmarks, often backed with interfacing or fusible webbing.
- Leather or faux leather: Durable and elegant, perfect for engraved or stamped designs.
2. Decorative Papers and Layers
- Scrapbook paper: Patterned paper adds color and interest quickly.
- Handmade paper: Adds texture and an organic, artisanal look.
- Recycled book pages or sheet music: Excellent for vintage-style bookmarks.
3. Adhesives
- PVA glue or white craft glue: Good all-purpose adhesive for paper.
- Glue stick: Convenient for thin papers; ensure it is acid-free for archival quality.
- Double-sided tape: Clean and fast for layered paper designs.
- Fabric glue: Necessary for attaching fabric embellishments or layers.
4. Inks, Paints, and Finishes
- Watercolor paints: Soft gradients and artistic washes.
- Acrylic paints: Bold colors and durable coverage.
- Ink pads: For stamping patterns, borders, and text.
- Markers and pens: Fine liners, brush pens, metallic markers for details and lettering.
- Varnishes and sealants: Clear acrylic spray, decoupage medium, or laminating sheets protect ink and paper.
5. Embellishment Materials
- Ribbons and cords: Ideal for tassels or top accents.
- Beads and charms: Add weight and decorative flair at the end of a tassel.
- Stickers and die-cuts: Quick decorative elements with various themes.
- Pressed flowers and leaves: For nature-inspired, botanical bookmarks.
- Embroidery threads: Used on fabric or through punched holes for stitched designs.
Essential Tools and Supplies
Beyond materials, certain tools help you craft neat, professional-looking handmade bookmarks from start to finish.
- Cutting tools: Sharp scissors, craft knife (X-Acto), and a self-healing cutting mat for clean edges.
- Ruler and set square: For accurate measurements and straight lines.
- Corner rounder punch: Rounds the edges for a polished look and improved durability.
- Hole punch or eyelet setter: For tassel holes or decorative metal eyelets.
- Bone folder: Helps create crisp folds and flatten layers.
- Brushes and sponges: For applying paint, ink, or decoupage medium.
- Heat tool (optional): Speeds up drying times for inks and paints.
- Laminator (optional): For fully sealed, waterproof bookmarks.
Step-by-Step Process: From Concept to Finished Bookmark
While every crafter develops a unique workflow, most handmade bookmarks follow a similar step-by-step process.
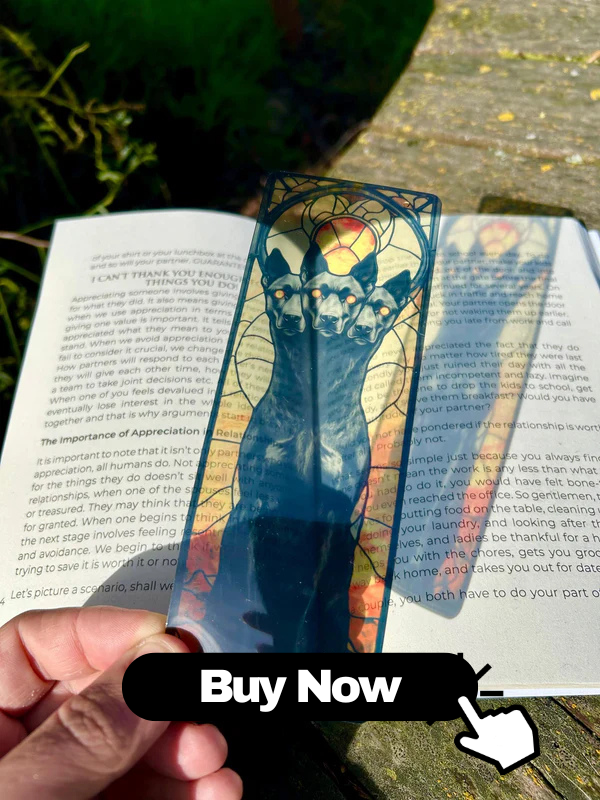
Step 1: Sketch and Plan
- Define the bookmark’s size, theme, and purpose.
- Sketch a rough layout, including placement of images, text, and embellishments.
- Choose a color palette that supports the theme.
Step 2: Cut the Base
- Measure your chosen bookmark dimensions on cardstock, chipboard, or fabric.
- Use a ruler and craft knife for straight, precise cuts.
- Optionally, use a corner rounder to soften sharp corners.
Step 3: Add Background Color or Texture
- Painted background: Apply watercolor washes, gradients, or splatters. Let each layer dry fully.
- Paper-covered background: Cut scrapbook or decorative paper slightly smaller than the base, then glue it down smoothly to avoid bubbles.
- Fabric-covered background: Adhere fabric using fabric glue or fusible webbing, trimming excess cleanly.
Step 4: Apply Main Design Elements
This is where the bookmark’s personality shines.
- Add illustrations with pens, markers, or paint.
- Attach die-cuts, cutouts, or collage elements from magazines, old books, or printed art.
- Use stamps and ink pads to create repeated patterns or focal images.
Step 5: Add Text or Quotes
- Lightly pencil in guidelines for straight text.
- Use hand-lettering, calligraphy, or typewritten text glued on in strips.
- Choose quotes that resonate with readers, such as lines from favorite books or motivational sayings.
For SEO-friendly crafting content, crafters often search for “bookmark quote ideas” or “literary quotes for handmade bookmarks,” so using meaningful, popular quotes can also appeal to buyers if you sell your creations.
Step 6: Attach Embellishments
- Punch a hole at the top center if you plan to add a tassel or ribbon.
- Insert an eyelet for extra durability at the hole.
- Attach ribbons, beads, pressed flowers, or small charms using appropriate adhesives.
Step 7: Seal and Protect
- Apply a thin layer of clear sealant (such as decoupage medium) over the surface for protection.
- Alternatively, run the bookmark through a laminator for a fully encased, wipeable finish.
- Allow all layers to dry completely on a flat surface.
Step 8: Final Trimming and Polishing
- Trim any rough edges or overhanging elements.
- Smooth corners with a corner rounder if needed.
- Inspect both sides for dried glue spots or smudges and clean them carefully.
Popular Crafting Techniques for Bookmarks
There are many ways to create distinctive handmade bookmarks. Below are some of the most popular techniques among bookmark makers and DIY enthusiasts.
1. Hand-Painted Bookmarks
- Use watercolor for dreamy, soft backgrounds with floral or landscape themes.
- Use acrylics for bold, opaque illustrations, geometric patterns, or abstract art.
- Seal the finished design to prevent color transfer onto book pages.
2. Collage and Mixed Media Bookmarks
- Combine scrapbook paper, magazine cutouts, washi tape, and stickers.
- Layer different textures such as tissue paper, lace, and stamped elements.
- Decoupage medium keeps all layers secure and flat.
3. Calligraphy and Hand-Lettered Bookmarks
- Focus on beautiful typography as the central design.
- Use brush pens, dip pens, or fine liners for scripts and decorative fonts.
- Pair text with small flourishes, doodles, or borders for balance.
4. Fabric and Sewn Bookmarks
- Cut cotton or linen into bookmark-sized strips and reinforce with interfacing.
- Add embroidery, appliqué, or patchwork designs.
- Finish edges with zigzag stitching, binding, or pinking shears to prevent fraying.
5. Pressed Flower Bookmarks
- Press flowers and leaves between heavy books for 1–2 weeks.
- Arrange them on cardstock and secure with clear adhesive.
- Lamination or clear contact film protects delicate plant material.
6. Leather Bookmarks
- Cut thin leather strips using a craft knife and metal ruler.
- Engrave or stamp names, quotes, or patterns using leather stamps or pyrography tools.
- Punch holes and add simple tassels or metal charms for a sophisticated finish.
Adding Embellishments and Decorative Details
Embellishments give handmade bookmarks their distinctive charm but must be chosen carefully to avoid damaging books.
1. Tassels and Ribbons
- Use embroidery floss, yarn, or thin ribbon to create tassels.
- Attach tassels through a hole at the top of the bookmark.
- Keep tassels light to prevent stress on delicate book spines.
2. Beads and Charms
- String beads on thin cord or wire and attach them to the tassel or bookmark top.
- Choose smooth, rounded beads to avoid scratching pages.
- Use themed charms (book, feather, key, star) to match specific genres or aesthetics.
3. Textural Elements
- Add lace, fabric scraps, or textured paper for tactile interest.
- Use embossing powders and a heat tool for raised, glossy details.
- Limit thickness to preserve the bookmark’s usability between pages.
Finishing and Protecting Your Handmade Bookmarks
Protective finishes are crucial for bookmarks that will be handled often and slid between book pages.
1. Laminating
- Place the finished bookmark in a laminating pouch, leaving a small border.
- Run it through a laminator according to the manufacturer’s instructions.
- Trim excess lamination, keeping sealed edges intact.
2. Sealing with Varnish or Decoupage Medium
- Brush on a thin, even coat over the front and back.
- Allow to dry fully, then apply a second coat if needed.
- Use non-tacky, clear-drying products to prevent sticking between pages.
3. Edge Treatment
- Sand or trim rough edges after sealing.
- Use a corner rounder to minimize frayed or bent corners.
- Inspect the bookmark by placing it inside a book to ensure it lies flat and smooth.
Common Mistakes to Avoid
Knowing common pitfalls helps you craft better, more professional handmade bookmarks.
- Using overly thick embellishments: Bulky items can damage book spines and pages.
- Skipping sealant: Unprotected ink and paint may smudge or fade over time.
- Poor adhesive choices: Low-quality glue can yellow, peel, or warp the paper.
- Ignoring paper grain and thickness: Too-thin paper bends easily and doesn’t hold its shape.
- Cluttered designs: Overloading the small space with too many elements makes the bookmark look busy and unbalanced.
Selling and Gifting Handmade Bookmarks
Once you’ve mastered the art of crafting bookmarks, you can share your creations with others—either as heartfelt gifts or as products in a small business.
1. Gifting Handmade Bookmarks
- Pair a bookmark with a favorite book as a personalized reading gift set.
- Create themed bookmarks for holidays, birthdays, or special occasions.
- Customize designs with names, monograms, or tailored quotes.
2. Selling Handmade Bookmarks Online
- Photograph bookmarks in natural light, styled with open books or cozy reading scenes.
- Use keywords like “handmade bookmarks,” “hand-painted bookmarks,” “custom literary bookmarks,” and “personalized book lover gifts” in product descriptions for better search visibility.
- Offer sets or collections (e.g., floral set, fantasy set) to increase order value.
3. Craft Fairs and Local Markets
- Display bookmarks in stands, baskets, or on boards so customers can flip through them easily.
- Group designs by theme (nature, quotes, minimalist, kids) for clear browsing.
- Provide protective sleeves or backing cards to keep them flat and clean.
How to Care for Handmade Bookmarks
With basic care, high-quality handmade bookmarks can last for many years.
- Store bookmarks flat when not in use, away from moisture and direct sunlight.
- Avoid bending or folding them unnecessarily.
- If laminated, wipe gently with a slightly damp cloth to remove dust.
- Keep fabric or leather bookmarks away from water and extreme humidity.
Conclusion: From Simple Strip to Cherished Keepsake
From the first design sketch to the final protective finish, crafting handmade bookmarks is a rewarding, creative process that transforms simple materials into meaningful keepsakes. By carefully planning your design, selecting quality materials, mastering basic techniques, and paying attention to details like sealing and embellishments, you can create bookmarks that are not only beautiful but also durable and practical.
Whether you’re making bookmarks for yourself, gifting them to fellow book lovers, or building a small creative business, understanding how handmade bookmarks are crafted from start to finish empowers you to produce pieces that readers will treasure every time they open a book. With practice, experimentation, and a bit of imagination, each new bookmark becomes a small, perfectly crafted companion on countless reading adventures.