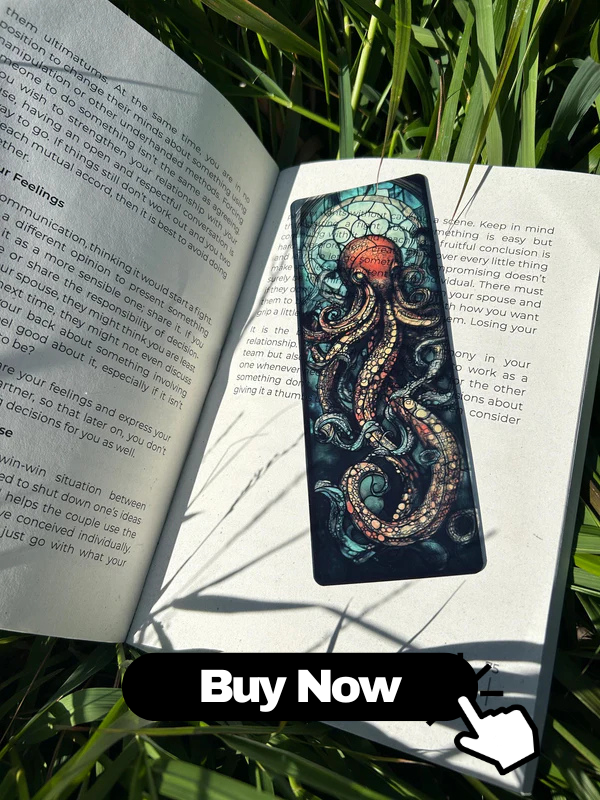
The world of handmade bookmark art is a fascinating blend of creativity, craftsmanship, and personal expression. Far more than simple page holders, handmade bookmarks are miniature works of art that reflect the artist’s personality, techniques, and inspirations. This in-depth guide explores the creative process behind handmade bookmark art—from initial ideas and sketching, to materials, techniques, finishing touches, and tips for selling and promoting your bookmark creations online. Whether you are a beginner exploring DIY bookmarks or an experienced artist refining your process, this article will walk you through each step in a detailed and practical way.
Understanding Handmade Bookmark Art
Before diving into the process, it helps to understand what sets handmade bookmark art apart from mass-produced bookmarks.
- Uniqueness: Each handmade bookmark is a one-of-a-kind piece, reflecting the artist’s style, mood, and technique.
- Function + Art: Unlike wall art, bookmarks must be thin, durable, and smooth enough to slide between pages without damaging the book.
- Personal Connection: Many people use handmade bookmarks as personal gifts, keepsakes, or collector’s items.
- Versatile Medium: Artists can work with paper, fabric, leather, wood, resin, pressed flowers, and more, making bookmarks a flexible creative outlet.
From an SEO perspective, terms like “handmade bookmarks,” “DIY bookmark art,” “artistic bookmarks,” and “custom bookmarks” are important because they match what people often search for when looking to make or purchase unique bookmark designs.
Inspiration and Creative Ideation
The creative process behind bookmark art often begins long before any materials are touched. Generating ideas is a crucial step.
Sources of Inspiration
-
Literature and Book Themes: Design bookmarks inspired by:
- Favorite novels and characters
- Popular book series and genres (fantasy, romance, mystery, sci‑fi)
- Quotes and memorable lines
-
Nature and Seasonal Motifs:
- Leaves, flowers, landscapes, and animals
- Autumn foliage, winter snowflakes, spring blossoms, summer beaches
-
Cultural and Artistic Styles:
- Minimalist and modern bookmark art
- Boho, vintage, or Victorian-inspired bookmarks
- Traditional patterns (mandalas, folk art, geometric designs)
-
Personal Stories and Emotions:
- Bookmarks that celebrate milestones (graduations, anniversaries)
- Emotion-inspired palettes—calm blues, energetic reds, earthy neutrals
-
Trends in Craft Communities:
- Social media platforms like Pinterest, Instagram, and TikTok
- Online communities focused on bookmark crafts and paper art
Developing a Cohesive Concept
Once you have inspiration, refine it into a clear concept.
-
Define the purpose:
- Is the bookmark for personal use, a gift, or for selling?
- Is it meant to be motivational, decorative, or themed to a specific book?
-
Choose a central element:
- A quote, a character, a pattern, or a visual symbol (e.g., a moon, feather, or flower).
-
Plan the mood:
- Soft and dreamy, bold and graphic, whimsical and playful, or elegant and minimal.
Having a well-defined concept makes the rest of the creative process smoother and helps produce cohesive bookmark designs that appeal to readers and collectors.
Planning the Bookmark Design
Planning bridges the gap between inspiration and execution. For high-quality handcrafted bookmarks, a bit of preparation saves time and reduces mistakes.
Determining Size and Shape
Common bookmark dimensions include:
- Standard size: Approximately 2 x 6 inches (5 x 15 cm)
- Slim size: Around 1.5 x 7 inches (4 x 18 cm)
- Oversized or decorative: 2.5 x 7.5 inches (6.5 x 19 cm) or custom
Key considerations:
- Bookmarks should fit comfortably in most books.
- Very wide or very thick bookmarks may damage pages or distort book spines.
- Rounded corners increase durability and comfort of use.
Sketching and Layout
-
Rough thumbnail sketches
- Create small, quick sketches to explore composition.
- Experiment with placement of text, illustrations, and decorative elements.
-
Final layout plan
- Decide where main artwork, background, and text will go.
- Leave margins at the edges to avoid cutting off important elements.
-
Balance and hierarchy
- Ensure the eye is drawn to the key feature, such as a quote or main illustration.
- Use size, contrast, and color to prioritize visual elements.
Color Palette Planning
- Choose a limited palette (3–5 main colors) for a cohesive look.
- Use color theory principles:
- Complementary colors for contrast (e.g., blue and orange)
- Analogous colors for harmony (e.g., blue, teal, green)
- Consider how colors affect mood:
- Cool tones for calm, warm tones for energy, neutrals for simplicity.
Effective design planning leads to aesthetic bookmark layouts that are pleasing, readable, and memorable.
Choosing Materials and Tools
The selection of materials profoundly influences both the look and longevity of your handmade bookmark art.
Base Materials for Bookmarks
-
Heavyweight Paper and Cardstock
- Ideal weight: 200–300 gsm for sturdy yet slim bookmarks.
- Works well with watercolor, ink, colored pencils, and markers.
-
Watercolor Paper
- Great for watercolor bookmarks and mixed media techniques.
- Choose hot-pressed for smoother surfaces or cold-pressed for textured finishes.
-
Craft and Mixed Media Paper
- Suitable for collage bookmarks, decoupage, and layered designs.
-
Fabric and Felt
- Used for sewn or embroidered bookmarks, often with interfacing for structure.
-
Leather or Faux Leather
- Durable and luxurious; often decorated with stamping, engraving, or pyrography.
-
Wood and Thin Veneers
- Used for laser-cut bookmark art or woodburned designs.
-
Resin and Acrylic
- Ideal for pressed flower bookmarks and clear, glossy designs.
Essential Tools
-
Cutting Tools
- Craft knife or precision cutter
- Metal ruler for straight lines
- Cutting mat to protect surfaces
- Paper trimmer for consistent bookmark sizes
-
Drawing and Painting Tools
- Pencils and erasers for sketching
- Fine-liner pens for inking
- Watercolor paints, gouache, acrylics, or inks
- Brush pens and markers for illustration and calligraphy
-
Adhesives
- Acid-free glue sticks or liquid glue for paper crafts
- Double-sided tape
- Mod Podge or decoupage glue for collage bookmarks
-
Finishing and Protection
- Laminator and pouches (optional but popular)
- Clear varnish or spray sealant (especially for watercolor or ink bookmarks)
- Corner rounder punch and hole punch
Choosing high-quality materials not only enhances the appearance of your artistic bookmarks but also ensures they remain beautiful after frequent use.
Step-by-Step Creative Process
The creative process behind a handcrafted bookmark can be broken down into clear stages.
1. Concept and Sketch
- Revisit your initial idea and notes.
- Draw a light pencil outline directly on the bookmark base or on scrap paper first.
- Mark the placement of:
- Main illustrations
- Decorative elements (stars, florals, borders, patterns)
2. Create Backgrounds
Backgrounds set the tone and depth of the bookmark design.
- Watercolor washes: soft, blended colors for dreamy, atmospheric effects.
- Acrylic or gouache: more opaque and vibrant backgrounds.
- Ink blending: blended dye inks applied with sponges or brushes.
- Patterned paper: pre-designed backgrounds for collage bookmarks.
Allow backgrounds to dry completely before adding details to prevent smudging or warping.
3. Add Main Illustrations or Motifs
- Carefully trace or freehand your main design over the background.
- Use light pencil lines first, then ink or paint for final details.
- Focus on clarity—bookmarks are small, so designs should be recognizable at a glance.
4. Incorporate Text and Lettering
Many handmade bookmark designs feature quotes or short phrases.
- Choose short, readable quotes that fit the bookmark dimensions.
- Use:
- Hand-lettering techniques
- Brush calligraphy
- Stamps or printed text glued onto the bookmark
- Ensure strong contrast between text and background for readability.
5. Detail Work and Embellishments
- Add highlights with:
- White gel pens
- Metallic markers (gold, silver, bronze)
- Fine glitter pens (used sparingly)
- Draw borders, frames, or small icons that complement the central design.
- Consider thematic accents (stars around a night sky scene, vines around a nature quote, etc.).
6. Drying and Flattening
- Allow all layers of ink, paint, and glue to dry thoroughly.
- If the bookmark warps, press it under:
- A stack of heavy books
- A weighted board or flat object
- Dry, flat surfaces are critical for professional-looking bookmarks.
7. Finishing Touches and Protection
This stage transforms artwork into a long-lasting, user-friendly bookmark.
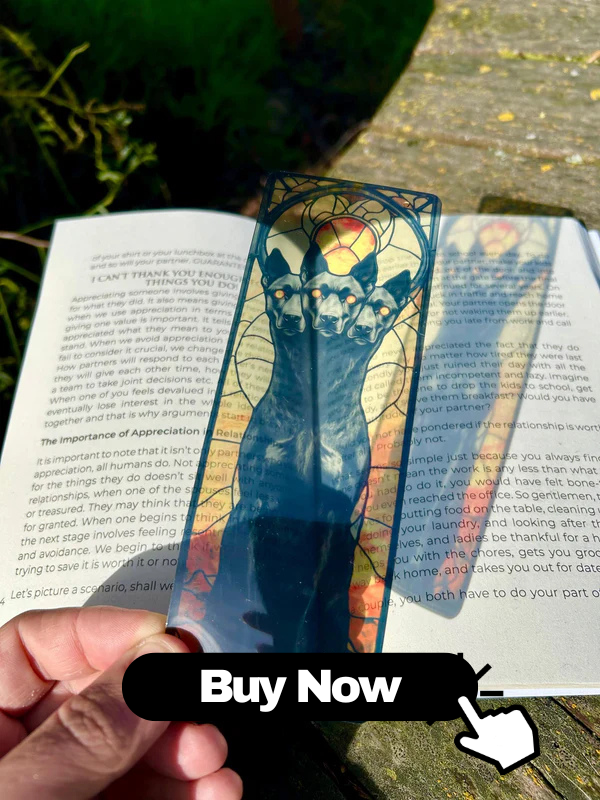
- Trim edges for clean lines.
- Round corners to prevent bending and tearing.
- Apply laminating film, spray sealant, or varnish as needed.
- Add tassels, ribbons, or charms through a punched hole at the top.
Popular Art Techniques for Bookmarks
There are numerous artistic techniques used in bookmark making. Combining methods can produce truly unique results.
Watercolor Bookmark Art
- Soft gradients and color washes
- Loose florals and botanical illustrations
- Sky scenes, galaxies, and abstract patterns
Tips:
- Use watercolor paper to prevent buckling.
- Layer colors gradually and allow drying between layers.
- Seal with a clear spray to protect from moisture.
Ink and Line Art Bookmarks
- Black and white illustrations with fine details
- Mandala bookmarks and geometric patterns
- Minimalist line drawings paired with simple quotes
Tips:
- Use waterproof, fade-resistant pens.
- Work slowly and patiently to avoid smudging.
Collage and Mixed Media Bookmarks
- Layered pieces of paper, magazine clippings, or book pages
- Fabric scraps, lace, and textured elements
- Stickers, stamps, and washi tape accents
Tips:
- Keep thickness under control so the bookmark still fits comfortably in a book.
- Use strong, acid-free adhesives for long-lasting results.
- Seal the surface with decoupage glue or a clear coating.
Pressed Flower and Botanical Bookmarks
- Real leaves, petals, and small flowers pressed flat
- Arranged on cardstock or encapsulated in resin
Tips:
- Ensure plants are fully dried and pressed to avoid mold.
- Use transparent laminating film or resin to protect delicate elements.
Digital and Hybrid Bookmark Art
- Design artwork digitally, then print on high-quality cardstock.
- Combine digital prints with hand-finished elements (outlined ink, metallic accents).
This approach is ideal for artists who sell printable bookmarks or need consistent designs for larger orders.
Adding Functional and Decorative Details
Beyond artwork, practical and decorative features enhance the bookmark’s usability and appeal.
Tassels and Ribbons
- Punch a hole at the top center of the bookmark.
- Thread through:
- Cotton or silk tassels
- Satin ribbons or jute string
- Embroidered threads or yarn
- Use colors that complement the design.
Charms and Beads
- Add small metal charms (keys, stars, leaves, book icons).
- Include beads on ribbon or cord for a more ornate look.
- Ensure charms are not too heavy; they should not damage the book spine.
Functional Enhancements
-
Magnetic bookmarks:
- Attach small magnets inside folded cardstock.
- Magnets hold the page from both sides for extra security.
-
Corner bookmarks:
- Folded triangular designs that slip over the page’s corner.
-
Tabbed or labeled bookmarks:
- Include tabs or index-like labels for students and researchers.
Finishing, Sealing, and Durability
Durability is a key aspect of the creative process behind practical bookmark art.
Lamination
- Protects artwork from moisture, dirt, and wear.
- Available in:
- Glossy finishes (vibrant, reflective)
- Matte finishes (subtle, less glare)
- Use a home laminator or self-adhesive laminating sheets.
Spray Sealants and Varnishes
- Clear acrylic sprays or fixatives for:
- Watercolor bookmarks
- Charcoal or pastel designs
- Mixed media with delicate details
- Test on a scrap sample first to ensure colors do not change.
Edge and Corner Care
- Use a corner rounder punch for polished, professional edges.
- Reinforce the hole (for tassels) with eyelets if the bookmark is heavy or will see frequent use.
Photographing and Presenting Your Bookmarks
If you plan to share, blog, or sell your handmade bookmarks, visual presentation is critically important.
Photographing Bookmark Art
- Use natural light near a window to avoid harsh shadows.
- Shoot on simple backgrounds:
- Plain white or neutral-colored surfaces
- Wooden tables or linen fabric for a warm, organic feel
- Show bookmarks:
- Flat, to highlight full design
- Inside a book, to show scale and context
- Grouped, if part of a coordinated bookmark set
Packaging and Presentation
- Use clear sleeves to protect bookmarks during shipping or gifting.
- Add backing cards with:
- Your name or brand
- Social media handles or website URL
- Care instructions (e.g., keep away from water, avoid bending)
- Consider eco-friendly packaging if that aligns with your brand values.
Selling and Marketing Handmade Bookmarks
The popularity of handmade bookmark art has created a strong market on platforms like Etsy, Shopify, and local craft fairs. Integrating SEO-friendly strategies into your product descriptions and online presence helps your artwork reach the right audience.
Where to Sell Handmade Bookmarks
- Online marketplaces:
- Etsy (popular for handmade and artistic bookmarks)
- eBay, Amazon Handmade
- Personal websites built with Shopify or WooCommerce
- Offline channels:
- Local bookstores and gift shops
- Art markets, craft fairs, and book festivals
- Library events and reading clubs
SEO and Keywords for Bookmark Listings
To improve your search engine visibility, use relevant keywords naturally in your product titles, descriptions, tags, and blog content.
- Core keywords to consider:
- Handmade bookmarks
- Hand-painted bookmarks
- Watercolor bookmark art
- Custom bookmarks
- Artistic paper bookmarks
- Pressed flower bookmarks
- Personalized bookmarks for readers
- Long-tail keyword examples:
- “floral watercolor handmade bookmark”
- “custom quote bookmark gift for book lovers”
- “minimalist black and white line art bookmark”
Writing Effective Product Descriptions
When describing your creative bookmark designs, include:
- Materials: cardstock weight, type of paint or ink, lamination details.
- Size: exact dimensions in inches and centimeters.
- Style and use: suitable for novels, planners, journals, or as bookish gifts.
- Care instructions: how to keep the bookmark clean and flat.
Building a Brand Around Bookmark Art
- Create a cohesive style (color schemes, themes, fonts) for your shop.
- Share behind-the-scenes content:
- Process videos of your creative steps
- Sketches and ideation boards
- Finished bookmark sets and packaging
- Engage with communities:
- Bookstagram, BookTok, and reading groups
- Craft forums and online art challenges
Creative Tips and Best Practices
Developing consistent, high-quality bookmark art requires both creativity and discipline.
Workflow Tips
-
Batch production:
- Cut multiple bookmark bases at once.
- Create a series using the same color palette or theme.
- Work on backgrounds for several bookmarks in one session.
-
Keep a design journal:
- Record ideas, color combos, and inspirational quotes.
- Sketch future bookmark concepts.
-
Practice on scrap pieces first:
- Test new techniques or tools before using them on final bookmarks.
Artistic Growth
- Experiment with different mediums (watercolor, ink, collage, digital).
- Study typography to improve your hand-lettered quotes.
- Collect reference images to refine your drawing skills.
Balancing Art and Function
- Avoid overly thick elements that may press into book pages.
- Use smooth finishes for areas that contact paper.
- Ensure tassels and charms do not make the bookmark top-heavy.
Common Mistakes to Avoid
Awareness of frequent pitfalls can save time and materials during the creative bookmark-making process.
-
Using thin paper:
- Flimsy bases bend easily and do not last; opt for sturdy cardstock.
-
Ignoring drying time:
- Rushing between layers leads to smudging, bleeding, and warped bookmarks.
-
Overcrowded designs:
- Too many elements make the bookmark hard to read and visually noisy.
-
Poor sealing or no protection:
- Unsealed watercolor or ink can fade, smear, or run if exposed to moisture.
-
Inconsistent sizing:
- Uneven measurements make sets look unprofessional; use a ruler or trimmer.
Final Thoughts on the Creative Process
The creative process behind handmade bookmark art is a rewarding journey that combines inspiration, design thinking, technical skill, and attention to detail. From brainstorming concepts and experimenting with watercolor, ink, or mixed media techniques, to refining your layouts, adding decorative tassels, and sealing the surface for durability, each step contributes to a unique piece of functional art.
By choosing quality materials, planning thoughtful designs, and optimizing how you present and describe your work online, you can create beautiful, durable, and highly collectible handmade bookmarks that resonate with readers, make meaningful gifts, and stand out in search results. Whether you craft bookmarks for personal enjoyment or as part of a creative business, focusing on both artistry and practicality will help your bookmark creations leave a lasting impression—on pages and on people.