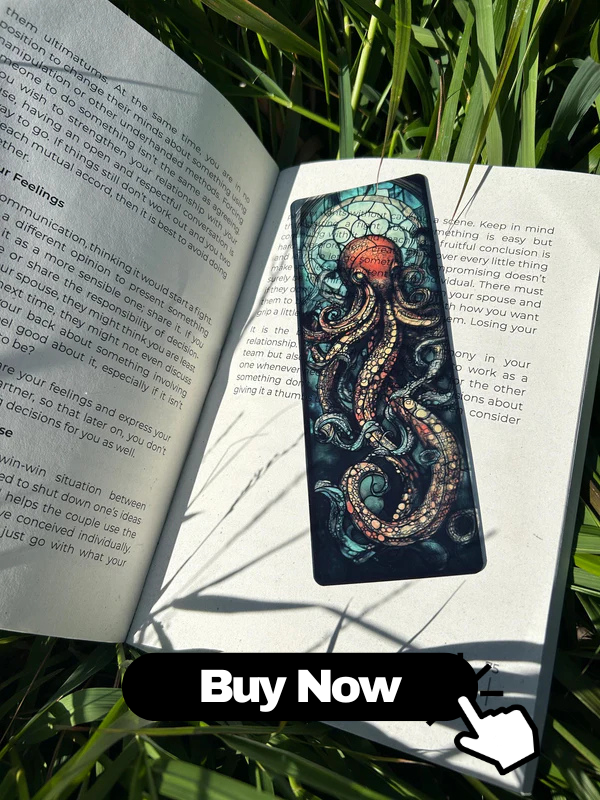
Handmade bookmark art is much more than a simple way to mark a page—it is a small, portable canvas that reflects creativity, personality, and craftsmanship. Understanding the creative process behind handmade bookmarks can inspire artists, crafters, and book lovers to design their own unique pieces. This in-depth guide explores every step of the journey, from gathering inspiration and materials to refining techniques, adding personal touches, and preserving these miniature works of art. Whether you are a beginner or an experienced crafter, learning the methods and mindset behind handmade bookmark art can transform your reading experience and fuel your artistic growth.
What Is Handmade Bookmark Art?
Handmade bookmark art refers to individually crafted bookmarks created using materials such as paper, cardstock, fabric, leather, wood, or mixed media. Each bookmark becomes a miniature art piece, combining:
- Practical function – marking your place in a book
- Artistic expression – showcasing illustration, painting, calligraphy, collage, or other creative techniques
- Personal meaning – reflecting the maker’s personality, mood, or love for reading
Unlike mass‑produced bookmarks, handmade bookmarks are unique and often one‑of‑a‑kind, which makes them highly valued by readers, collectors, and gift‑givers. In the world of DIY crafts, handmade bookmark art is a perfect intersection of creativity, accessibility, and everyday usability.
Why Handmade Bookmarks Matter
Handmade bookmark art has become increasingly popular among book lovers, crafters, and small business owners. Several reasons explain this growing interest:
- Connection to reading: A handmade bookmark adds a ritualistic pleasure to reading; you are not just opening a book, but interacting with a small piece of art.
- Affordable art: It offers an accessible way to own or gift original artwork without the high cost of large pieces.
- Creative outlet: The small format reduces pressure; it feels manageable for beginners and allows experienced artists to experiment.
- Thoughtful gifts: Personalized bookmarks make meaningful gifts for birthdays, holidays, and book clubs.
- Small business potential: Many artists turn their bookmark designs into income through online shops and craft markets.
From an artistic standpoint, the creative process behind handmade bookmark art encourages experimentation with color, typography, illustration, and design on a compact scale, making it ideal for creative growth and skill development.
Finding Inspiration for Bookmark Designs
Every creative project begins with inspiration. For handmade bookmarks, potential sources are nearly endless. Artists often draw from:
- Books and literature: Quotes, characters, scenes, and settings from novels, poetry, and classics.
- Nature and seasons: Leaves, flowers, skies, landscapes, and seasonal color palettes.
- Patterns and textures: Geometric patterns, vintage wallpaper designs, textile prints, and mandalas.
- Personal interests: Hobbies like gardening, gaming, music, or travel.
- Cultural motifs: Traditional patterns, calligraphy, or symbols from different cultures (used respectfully and with understanding).
- Everyday objects: Coffee cups, stationery, windows, or cityscapes.
To cultivate inspiration for bookmark art:
- Keep a visual journal: Collect color swatches, doodles, and small sketches that could fit bookmark proportions.
- Create a mood board: Use digital tools or a physical board with cutouts of images, textures, and colors.
- Observe your favorite books: Think about how you can visually interpret a story, phrase, or mood.
- Follow creative communities: Look at handmade bookmark examples on social media platforms and craft forums for fresh ideas.
The key is to balance inspiration and originality, using external influences to spark your own unique designs rather than copying existing works.
Essential Materials and Tools
The creative process is shaped by the materials and tools you choose. For effective bookmark design, it is important to understand the options and how they influence the final result.
Common Base Materials
- Heavyweight paper or cardstock: Ideal for watercolor, ink, and colored pencil. Look for acid‑free options to avoid yellowing.
- Watercolor paper: Best for wet media like watercolor, gouache, or ink washes; provides texture and durability.
- Mixed‑media paper: Suitable for combining dry and wet media without heavy warping.
- Fabric or felt: Provides a soft, tactile finish; often combined with embroidery or applique.
- Leather or faux leather: Offers a sturdy, long‑lasting base with a luxurious feel.
- Wooden blanks: Great for laser engraving, wood burning (pyrography), or acrylic painting.
Drawing and Painting Tools
- Graphite pencils: For initial sketches and light guidelines.
- Fineliner pens: For outlines, line art, and intricate details.
- Brush pens: For calligraphy, lettering, and expressive strokes.
- Colored pencils: For layering, shading, and controlled color.
- Watercolor paints: For soft gradients, washes, and atmospheric effects.
- Acrylic paints: For opaque, vibrant designs, especially on wood or primed surfaces.
- Alcohol markers: For smooth, even coloring and blending.
Adhesives and Decorative Elements
- Glue sticks or liquid glue: For paper collage and layering.
- Double‑sided tape: Clean and convenient for attaching elements or laminating.
- Washi tape: Adds pattern and color quickly, often used for borders.
- Stickers and stamps: For repetitive patterns, motifs, or quick embellishments.
- Ribbons, tassels, and charms: For finishing touches at the top or bottom of the bookmark.
Cutting and Measuring Tools
- Craft knife and cutting mat: For clean edges and intricate cut‑outs.
- Scissors: For general cutting and trimming.
- Metal ruler: For straight lines and accurate measurements.
- Corner rounder punch: To smooth edges and prevent bending or tearing.
Protection and Finishing Supplies
- Laminating sheets or pouches: To protect paper bookmarks from wear and moisture.
- Clear sealant (spray or brush‑on): For painted surfaces and mixed media pieces.
- Mod Podge or similar medium: For decoupage and sealing collage elements.
Choosing high‑quality, durable materials ensures that your handmade bookmark art remains functional and beautiful even with regular use.
Planning the Design: From Concept to Sketch
A strong creative process usually begins with intentional planning. While spontaneous designs can be charming, planning helps maintain balance, readability, and durability.
Defining the Purpose
Ask yourself:
- Is this bookmark for personal use, a gift, or for sale?
- Is the design themed for a specific book, genre, or event (e.g., fantasy novels, romance, children’s books)?
- Do you want the bookmark to feature quotes, illustrations, patterns, or abstract art?
Choosing the Orientation and Layout
- Vertical bookmarks: The most common format; ideal for tall illustrations and vertical quotes.
- Horizontal bookmarks: Less common but unique; works well for panoramic scenes.
Once orientation is decided:
- Sketch a simple layout: Divide the space into sections for text, imagery, and negative space.
- Plan focal points: Decide where the viewer’s eye should land first—often the central illustration or a bold quote.
- Balance text and imagery: Ensure that lettering does not overwhelm visuals, and vice versa.
Color Palette and Style
- Choose a limited color palette (e.g., 3–5 colors) for harmony.
- Consider the mood of the bookmark:
- Soft pastels for calm and cozy reading themes
- Bold primaries for energetic or children’s designs
- Earth tones for nature or rustic aesthetics
- Decide on a style direction: minimalistic, whimsical, realistic, abstract, vintage, or modern.
Planning does not limit creativity; instead, it provides a structure within which your creative ideas can flourish.
Choosing Artistic Techniques and Styles
A significant aspect of the creative process in handmade bookmark art is choosing the right techniques and artistic styles. These choices influence the visual impact and user experience.
Popular Techniques for Handmade Bookmark Art
- Illustration and drawing: Using pens, pencils, and markers to create characters, scenes, or patterns.
- Watercolor painting: Ideal for dreamy backgrounds, floral themes, and gentle gradients.
- Calligraphy and hand lettering: Featuring inspiring quotes, names, or phrases in artistic scripts.
- Collage and mixed media: Combining paper pieces, magazine cutouts, tickets, maps, or ephemera.
- Stamping and stenciling: Repeating motifs or detailed images with consistent shapes and lines.
- Digital‑to‑physical hybrid: Designing digitally and then printing, cutting, and embellishing by hand.
- Embroidery and textiles: Stitching designs onto fabric or felt bookmarks.
- Pyrography and woodburning: Etching designs onto wooden bookmark bases.
Matching Technique to Purpose
When selecting techniques, consider:
- Durability: Will the media smudge easily? Are you sealing it properly?
- Time investment: Detailed watercolor or embroidery takes longer than simple line art or stamping.
- Audience: Children may prefer bold, colorful designs; minimalists may prefer simple, clean lines.
Experimenting with different styles over multiple projects is an excellent way to develop your artistic identity as a bookmark creator.
Step‑by‑Step Creative Process for Handmade Bookmarks
While every artist develops a personal workflow, the following step‑by‑step process provides a clear framework for creating high‑quality handmade bookmark art.
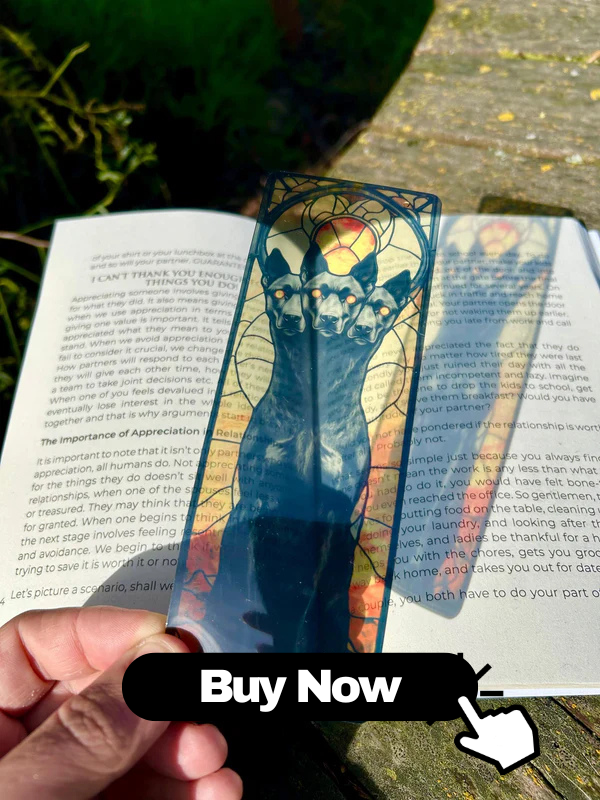
Step 1: Brainstorm and Gather Ideas
- Note themes, quotes, or images you want to explore.
- Collect references (photos, book covers, patterns).
- Decide on a series or single bookmark (series help maintain consistency for a collection or shop).
Step 2: Choose Materials and Cut to Size
- Select paper, cardstock, or other base material suitable for your chosen medium.
- Common bookmark dimensions include:
- 5 cm × 15 cm (2 in × 6 in)
- 5.5 cm × 17 cm (2.25 in × 6.7 in)
- Cut the base cleanly with a craft knife and ruler or a paper trimmer.
- Round the corners if desired to prevent fraying or bending.
Step 3: Create Light Pencil Sketches
- Outline major shapes and text placement lightly with a pencil.
- Ensure important elements are not too close to the edges, especially if you plan to laminate.
- Check for visual balance: no area should feel too crowded or too empty.
Step 4: Apply Base Colors or Background
- Lay down background washes (watercolor) or flat colors (markers, acrylic) first.
- Allow each layer to dry thoroughly to avoid smudging.
- Maintain a smooth, even finish, especially if text will be added on top.
Step 5: Add Details, Line Work, and Lettering
- Refine outlines with fineliners or darker pencils once the base is dry.
- Add shading, highlights, and decorative motifs.
- Use guidelines (light pencil lines) for straight, evenly spaced lettering.
- Experiment with hand lettering styles for quotes or names to enhance visual interest.
Step 6: Incorporate Embellishments
- Add washi tape strips as borders or accents.
- Attach small cutouts, stickers, or pressed flowers.
- Ensure embellishments are flat enough not to damage book pages.
Step 7: Let Everything Fully Dry
- Allow inks, paints, and glue to cure completely to prevent sticking to book pages or lamination sheets.
- Place the bookmark under a heavy book (with protective paper) to keep it flat if needed.
Step 8: Protect and Seal the Bookmark
-
For paper bookmarks:
- Lamination with a home laminator or self‑adhesive sheets.
- Spray sealant to preserve watercolor or pencil art.
-
For painted wood or leather:
- Use clear acrylic sealers or varnishes suitable for the medium.
- Trim excess lamination or sealant edges for a neat finish.
Step 9: Add Ribbons, Tassels, or Charms
- Use a hole punch at the top center (if desired).
- Thread through:
- Ribbons that match or contrast the color scheme
- Handmade tassels (cotton, embroidery floss, yarn)
- Small charms related to the theme (e.g., tiny book, leaf, star)
- Secure knots tightly so the embellishments do not loosen with use.
Adding Personalization and Storytelling
One of the most appealing aspects of handmade bookmark art is customization. Personalized bookmarks carry emotional value and turn functional objects into keepsakes.
Ways to Personalize Handmade Bookmarks
- Names or initials: Add the recipient’s name in calligraphy or stylized fonts.
- Favorite quotes: Include lines from beloved books, poems, or authors.
- Symbols and motifs: Use imagery that reflects hobbies, careers, or passions.
- Color preferences: Choose palettes based on favorite colors or aesthetic styles.
- Dates and occasions: Add small inscriptions to mark birthdays, graduations, or anniversaries.
Crafting a Story Through Design
Bookmarks can subtly tell a story. Consider:
- Designing a bookmark series based on chapters of a novel or stages of a journey.
- Creating visual narratives that unfold from top to bottom of the bookmark.
- Using recurring motifs (stars, leaves, keys, clocks) to suggest themes like time, growth, or adventure.
Story‑driven bookmark art deepens the connection between the reader, the book, and the handmade piece they use every day.
Finishing, Sealing, and Protecting Bookmark Art
Finishing steps are crucial for the longevity and professional appearance of handmade bookmark art. A beautiful design can be easily damaged without proper protection.
Why Sealing Matters
- Prevents smudging of pencil, ink, and marker lines.
- Protects from moisture, oils from fingertips, and general wear.
- Reinforces thin paper to avoid bending or tearing.
Common Protection Methods
-
Lamination:
- Offers excellent protection and a professional finish.
- Can be glossy or matte, depending on your preference.
- Ensure all decorations are firmly adhered before laminating.
-
Clear spray sealants:
- Ideal for watercolor, colored pencil, and ink drawings.
- Apply in thin, even coats in a well‑ventilated area.
-
Brush‑on varnish or Mod Podge:
- Works well for mixed media and collage designs.
- Use a soft brush to avoid streaks.
Careful finishing ensures that your handcrafted bookmark remains both artistic and durable, even after months or years of use.
Photographing and Sharing Your Bookmark Creations
If you want your handmade bookmark art to gain visibility—whether for a portfolio, social media, or an online shop—good photography and presentation are essential parts of the creative process.
Basic Photography Tips for Bookmark Art
- Use natural light: Shoot near a window for soft, even lighting.
- Choose a clean background: Neutral tones or subtle textures (wood, linen) keep focus on the bookmark.
- Show scale: Include a book or a hand in some shots to indicate size.
- Capture details: Take close‑ups of textures, lettering, and embellishments.
Sharing on Social Media and Blogs
- Post progress photos to demonstrate the creative process behind your handmade bookmark art.
- Write short captions explaining your inspiration, materials, or techniques.
- Use relevant hashtags and keywords like:
- #handmadebookmarks
- #bookmarkart
- #bookishart
- #watercolorbookmarks
Documenting and sharing your process not only increases your reach but also helps other creators learn and feel inspired.
Selling, Gifting, and Using Handmade Bookmarks
A natural extension of mastering the creative process is deciding how to share your handmade bookmarks with others.
Selling Handmade Bookmark Art
- Online marketplaces: Platforms like Etsy, Shopify, or other craft‑focused sites are ideal for selling small art.
- Craft fairs and markets: Offer direct feedback from customers and help you see which designs are most popular.
- Bookstores and local shops: Consignment or wholesale arrangements allow you to reach local readers.
Packaging and Presentation
- Use clear sleeves to protect bookmarks during transport and display.
- Add branded tags or small cards with care instructions.
- Include a handwritten note or story about the design to increase perceived value.
Gifting and Personal Use
- Create custom bookmarks as party favors, wedding favors, or book club gifts.
- Pair handmade bookmarks with books as a thoughtful gift set.
- Rotate your own bookmark collection to match your current read or mood.
Whether sold or gifted, your handmade bookmark art becomes a small but meaningful part of someone’s reading life.
Common Mistakes and How to Avoid Them
Understanding typical pitfalls will help you refine your creative process and produce higher‑quality bookmark art.
-
Using thin or low‑quality paper:
- Solution: Invest in sturdy cardstock or mixed‑media paper that can withstand handling and media.
-
Overcrowding the design:
- Solution: Embrace negative space; focus on one main idea per bookmark.
-
Ignoring the edges:
- Solution: Keep key details at least a few millimeters away from the edges to avoid cropping or damage.
-
Not allowing sufficient drying time:
- Solution: Plan for drying breaks between layers and before sealing or laminating.
-
Unsealed media smudging in books:
- Solution: Always test pens, paints, and sealants on scrap paper before applying to the final bookmark.
Helpful Tips for Beginners
If you are new to handmade bookmark art, starting simple and building skills over time will make the creative process enjoyable and sustainable.
- Begin with basic shapes and patterns: Stripes, dots, simple florals, and geometric forms are easier to master.
- Practice on scrap material: Test color palettes, lettering styles, and techniques before working on final pieces.
- Create in small batches: Work on several bookmarks at once to experiment with variations and save time.
- Study composition: Look at other bookmarks or small artworks and analyze what makes their layouts appealing.
- Keep a “bookmark sketchbook”: Dedicate a small notebook to thumbnail sketches and layout ideas.
Sustainable and Eco‑Friendly Bookmark Art
Many artists are increasingly focused on eco‑friendly bookmark making, reducing waste while maintaining beauty and quality.
Eco‑Conscious Material Choices
- Recycled paper and cardstock: Look for high‑quality options made from post‑consumer materials.
- Upcycled materials: Old book pages, maps, sheet music, or packaging can be transformed into creative backgrounds.
- Natural fibers and fabrics: Use cotton, linen, or hemp scraps for textile bookmarks.
- Non‑toxic inks and paints: Choose water‑based, low‑VOC options when possible.
Low‑Waste Creative Practices
- Use off‑cuts from larger projects to create mini bookmarks and tags.
- Plan designs to fit standard paper sizes efficiently, minimizing scraps.
- Repurpose test sketches by turning them into collaged or layered bookmark designs.
Sustainable crafting practices allow you to enjoy the creative process behind handmade bookmark art while caring for the environment.
Creative Prompts and Bookmark Project Ideas
To keep your creativity flowing, try structured prompts that encourage experimentation and new concepts.
Themed Bookmark Series Ideas
- Seasonal bookmarks: One for each season—spring florals, summer beaches, autumn leaves, winter nights.
- Literary genres: Designs inspired by fantasy, mystery, romance, sci‑fi, and historical fiction.
- Color challenges: Create bookmarks limited to monochrome or a specific color scheme.
- Alphabet project: A bookmark for each letter of the alphabet, featuring corresponding imagery.
Prompt List for Individual Bookmarks
- Illustrate a favorite quote from your current read.
- Create a pattern using only circles and lines.
- Design a bookmark based on a place you would like to visit.
- Make a minimalist bookmark using only two colors.
- Turn a pressed leaf or flower into the centerpiece of your design.
- Design a bookmark that tells a tiny story from top to bottom.
- Create a bookmark inspired by a song or piece of music.
Using prompts can help you overcome creative blocks, explore new directions, and expand your bookmark art portfolio.
Conclusion: The Joy of the Creative Bookmark Process
The creative process behind handmade bookmark art transforms a simple, everyday object into a meaningful work of miniature design. From the early stages of gathering inspiration and sketching ideas to the satisfaction of sealing your finished piece, each step offers opportunities to experiment, express yourself, and connect with the world of books in a deeper way. By understanding materials, refining techniques, and embracing personalization, you can create bookmarks that are not only functional but also cherished as small works of art. Whether you keep them, gift them, or share them with a wider audience, your handmade bookmarks will carry a piece of your creativity into every page they mark.